Zotac OpenWRT

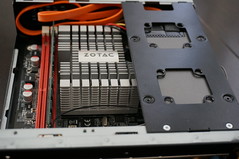
ZOTAC! The Zotac NM10-ITX is a mini-ITX motherboard, which in my configuration has a 1.66 GHz Atom D510 on board, 8 GB SSD, 2 GB ram, and a pair of 2×2 ath9k devices. I wound up with a few of these boxes as a mesh testbed due to my work with Cozybit. Until recently, they ran distro11s, which is basically Debian with some mesh/wireless utilities and some custom init scripts thrown on top. I was looking to re-image them, and I believe distro11s is not actively maintained. The boxes are beefy enough to run unmodified Debian, but OpenWRT has various niceties when building all things wireless from source, and I might like to run the same setup on more constrained devices, so I went with that.

Building OpenWRT from git is a rather simple affair [1]. In my case, I made a few trips through make kernel_menuconfig to get the right config for a properly booting kernel (namely, CONFIG_ATA_PIIX, CONFIG_INPUT_EVDEV, CONFIG_USB_HID, CONFIG_HID_GENERIC, and CONFIG_R8169 were needed for functional disk, keyboard, and network on boot). I also customized the network setup via files/etc/config/network so that eth0 would come up with DHCP rather than a fixed IP at 192.168.1.1.

Once built, one needs a way to copy the OpenWRT image onto the drive. Enter Bootable USB Stick.

I recently procured a speedy, spacious USB stick in order to run a sizeable VM on my disk-space-poor laptop. As I already had an ext4 partition on the USB stick, making it into a bootable rescue/installer OS was mostly a matter of debootstrap [2]. I gave it a user account, put my ssh keys on it, and also configured it to start up with DHCP on the first interface. Among other things, that means linking /etc/udev/rules.d/70-persistent-net.rules to /dev/null so that, as the rescue OS is booted on multiple machines, the first NIC remains named eth0.

On top of the base install, I copied the OpenWRT combined disk image onto the stick. Imaging a new machine then involves booting off the USB drive, overwriting the main block device with the disk image, and then resizing the root partition to use the full drive:

#!/bin/bash
gzip -dc /home/bob/openwrt-x86_64-combined-ext4.img.gz > /dev/sda
p2start=`sfdisk -d /dev/sda | grep sda2 | awk '{print $4}' | sed -e "s/,//"`
cat<<__EOM__ | fdisk /dev/sda
d
2
n
p
2
$p2start

w
__EOM__
resize2fs /dev/sda2
# may customize root image here for each device by mounting it, etc.

You can build disk images that match your disk size and skip repartitioning and resize2fs, but in the case that the disk is large (like mine), zero-filling all the unused space is a big waste of time. I'm sure there is a smart way to use sparse images to overcome this, but fdisk/resize2fs is the simplest thing that works for me.

Since I have my local DHCP server set up to assign known addresses and DNS names to these machines based on their MAC address, I can do the installs without a console on each machine: plug in the stick, reboot, ssh into it when it comes up, run my imaging script, shutdown and pull the stick. Easy!

Tablet guts

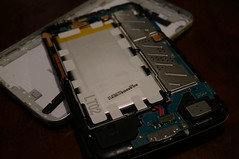
Tablet gutsIn case you want to know what the inside of a Samsung Galaxy Tab 3.0 looks like, I propose the following experiment: unplug one, and let it sit unused and un-powered for two months. You will then find it in the state where disconnecting and reconnecting the battery is required to get it to charge again. I am not making this up. Oh, and opening it is pretty tricky even with the proper plastic tools to do so. Since I have two of them, that’s how I lost thirty minutes of my life on Saturday.

As for why I have two: this particular model has a Marvell SoC inside, and the wireless SD8787 peripheral can be used with the upstream cfg80211-based mwifiex driver. For cozybit, I helped write an alternative mac80211 driver that can run mesh. It was a little slower and more power hungry than mwifiex, but in addition to being mesh/ibss/AP capable, had some nice-for-development features like SDIO tracing and an nl80211-testmode interface that could run firmware commands from userspace, upon which we built some test scaffolding. You can get the code for that driver today, but development is pretty much at a dead end because we needed to extend the firmware for host-based operation, and there will probably never be a redistributable firmware at this point.

I’d love to have an open firmware for the device, but as I have seen and touched the NDA encumbered firmware, it’s unlikely that I can have any hand in bringing that about.

++router

As a sometime wireless hacker, it’s a bit embarrassing to admit that I’ve had the factory firmware on my wifi router all this time, but when I first tried OpenWrt on it, ath9k was only a few months old and dropped connections all the time. Thus, I made do with the factory install but ran many of the essential services (dns, dhcp, tftp, etc) from my Linux workstation. And life continued apace.

After a recent network upgrade, I found I could no longer make my router understand ipv6, and so it was time to put the original firmware to pasture. In the intervening years, ath9k grew up, so I took another try with OpenWrt. The install took about 20 minutes, most of which was configuring the firewall and copying my existing dnsmasq config into a uci-friendly format. Everything works great and my ipv6 is back. Nice job, all involved!

I suppose I could now eat even more dogfood by running a mesh interface on one of the radios. In the past, I’ve tinkered with mesh as a wireless distribution system, but I don’t have much of a use for that currently with every room in the new place being wired. Perhaps my backyard could use expanded coverage?

vim cheat codes

Or, how I read parts of the fine manual.

Yesterday, after spending way too much time trying to get find(1) to exclude vim swapfiles, I finally had it with them cluttering up my work directories. As is usually the case when vim triggers an itch, I thought, “there must be a setting for that,” and lo, there was.

set directory=~/.vimswap//

Make that directory and all the swap files go there instead. The trailing double slashes mean the swap files get named in such a way as to avoid conflicts.

Here are some other things added to my vimrc over the last year or so.

Show whitespace issues as spelling mistakes:

match SpellBad /s+$| +zet/

I used to always set my windows to 80 columns, but then I started using ‘set number’ and then all of that went out the window, so to speak. So now I do this to show where wrapping needs to happen:

set colorcolumn=80

This hack is kind of neat, it shows +/- change markers on the edge, based on git changes in your working copy:

https://github.com/airblade/vim-gitgutter

(To make it less intrusive, I added highlight clear SignColumn.)

Once upon a time, I had a really complicated macro to search up the directory hierarchy looking for tags files. It turns out vim already does that if you add a semicolon in there (:help file-searching):

set tags=./tags;

Phone bugs

If you want to experience what it is like to be the first person to ever do something, might I suggest turning on all the debug knobs on an Android vendor kernel? Some speculative fixes over here, but there is still at least one other RCU bug on boot, and this use-after-free in the usb controller driver:

[   34.520080] msm_hsic_host msm_hsic_host: remove, state 1
[   34.525329] usb usb1: USB disconnect, device number 1
[   34.529602] usb 1-1: USB disconnect, device number 2
[   34.637023] msm_hsic_host msm_hsic_host: USB bus 1 deregistered
[   34.668945] Unable to handle kernel paging request at virtual address aaaaaae6
[   34.675201] pgd = c0004000
[   34.678497] [aaaaaae6] *pgd=00000000
[   34.681762] Internal error: Oops: 5 [#1] PREEMPT SMP ARM
[   34.686737] Modules linked in: wcn36xx_msm(O) wcn36xx(O) mac80211(O) cfg80211(O) compat(O)
[   34.694976] CPU: 1    Tainted: G        W  O  (3.4.0-g4a73a1d-00005-g311eaee-dirty #2)
[   34.702972] PC is at __gpio_get_value+0x28/0x1cc
[   34.707489] LR is at do_restart+0x24/0xd8
[   34.711486] pc : []    lr : []    psr: 60000013
[   34.711486] sp : ebcd9ed8  ip : c032a858  fp : ebcd9ef4
[   34.722930] r10: 00000000  r9 : c04dd67c  r8 : 00000000
[   34.728210] r7 : c4d81f00  r6 : 6b6b6b6b  r5 : c10099cc  r4 : aaaaaaaa
[   34.734680] r3 : 09090904  r2 : c1672f80  r1 : 00000010  r0 : 6b6b6b6b
                                                                 ^^^^^^^^ whoops
[   34.741241] Flags: nZCv  IRQs on  FIQs on  Mode SVC_32  ISA ARM  Segment kernel
[   34.748504] Control: 10c5787d  Table: acfb006a  DAC: 00000015

I guess I should try to find out where to report bugs for these (predictably) not upstream drivers, but that seems like a total pain.

On forecasting

I’m really enjoying Nate Silver’s The Signal and the Noise, particularly as someone who has come to appreciate statistics and machine learning only grudgingly and late in life. This book would have been a much gentler introduction to the concepts of statistical prediction than my own: the dense, equation-filled Pattern Recognition and Machine Learning by Bishop. However, my edition of Signal has a few errors that had me scratching my head, such as a chessboard showing an impossible opening position. And there was this gem:

“At NASA, I finally realized that the definition of rocket science is using relatively simple psychics to solve complex problems,” Rood told me.

I guess ML would be easier if we had more of these simple psychics to go around.

Pumpkins all Pumpkiny

It is a bit late for a Halloween post, but insert lame excuse here. Consider it a counter-balance to the force that causes Christmas decorations to show up in stores in September.

IMG_4305This year I chose Toopy and Binoo, a Canadian children’s cartoon pair that you have probably never heard of, as subjects for my pumpkin carving. Unfortunately, the pumpkins shriveled quite quickly, and the designs didn’t lend themselves well to preservation, so by Halloween, they grew a toothpick scaffolding to maintain their facade. Next year, I believe I’ll try not cutting all the way through to avoid such issues. (I’m not sure what that technique is called, but some of the more artistic neighbors employed it to great effect.)

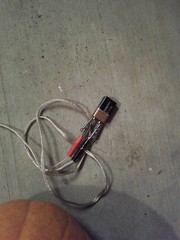
5 minute pumpkinImprovised pumpkin lightInside these gourds I used little battery-powered LED lights made for the purpose instead of actual candles. While LED lights don’t look nearly as nice as real candles, one need not care so much about potentially setting things on fire. On the evening of the 31st, as a few groups of kids had already arrived and absconded with their hard-earned treats, I found myself with a third pumpkin untouched by blade, but no light (or candle) to go in it, should I decide to carve it. Then, I remembered my extra spools of SMT LEDs from the cabinet lighting project. I calculated that a 9 volt battery could power three such LEDs for about 10 hours (that estimate was conservative by a factor of 3, it turned out — I need to go back to EE school). Thanks to various other projects, I already had some speaker wire with alligator clips on each end, so, in the course of 5 minutes, I threw together a functional pumpkin light, carved a few holes in the pumpkin, and called it a day. No need to clean out the guts when open flames are not a factor.

IMG_4423For his first Halloween, Ian went as a dragon. Typical of his recent enthusiasm for all things space-related, Alex went as an astronaut. Instead of saying “trick-or-treat,” he would announce, “Hi, I’m Alex. I’m an astronaut!” Much candy was received, all the same.

Footprint, Part 2

My recent posting of ASCII art was intentionally subtle, perhaps overly so. If you haven’t figured it out by now, it is a C program that announces the birth of our second child. When compiled and executed, it prints:

Ian Yit-Sing Copeland
Born 5 August, 2013 at 02:49
Weight 6 lbs 11 oz

In this post, I will explain how I created it.

Like many a C practitioner, I’ve always found International Obfuscated C Code Contest entries to be at once entertaining and mystifying. While I don’t consider this effort to be near the level of IOCCC entries, I thought it might be fun to try my own IOCCC-lite ASCII art program.

I knew I wanted the program to simply print an announcement string, in a non-obvious fashion. It also had to be easy to modify the program with the actual details on the day of the delivery. Indeed, I wrote this program several weeks in advance and modified the output in only a few minutes.

Thanks to the Can You Crack It challenge, I already had an RC4-like algorithm sitting on my disk. The plan then was simple: embed the key and ciphertext in the program, and just decrypt and print it. Of course, the ciphertext would be all binary, which is hard to encode in a compact manner in the source. Thus, I decided to store the ciphertext in base32 encoding.

I actually didn’t put much effort into obfuscating the code; the main issue was getting the size of the source code into around 600 characters, and doing that involved using typedefs and one-letter variable names already. By the time that was done, I didn’t change much. Apart from variable naming, the main obfuscation step was to change the base32 mapping table to consist only of numbers and symbols so that the embedded string would itself look like code. The code otherwise is pretty straight-forward.

My starting point, which base32-decoded and decrypted some placeholder text, looked like this:

#include <string.h>
#include <stdio.h>

char str[] = "43(:7&!#3&@>$%^|]:&6;<7*-$}9{;!*!$5{<;-=^8]#:5<@#%#&!5!@40207#9($3&)7<$1";

int b32dec(char *in, char *out, int len)
{
    int i;
    char alpha[] = "3:5[9&2^]{7}*<-8@=4(6#!>|)0+;1$%";
    for (i=0; i < len; i++)
    {
        unsigned char bits = strchr(alpha, in[i])-alpha;
        int j = (i / 8) * 5;
        switch (i % 8) {
            case 0:
                out[j + 0] |= bits << 3;
                break;
            case 1:
                out[j + 0] |= bits >> 2;
                out[j + 1] |= bits << 6;
                break;
            case 2:
                out[j + 1] |= bits << 1;
                break;
            case 3:
                out[j + 1] |= bits >> 4;
                out[j + 2] |= bits << 4;
                break;
            case 4:
                out[j + 2] |= bits >> 1;
                out[j + 3] |= bits << 7;
                break;
            case 5:
                out[j + 3] |= bits << 2;
                break;
            case 6:
                out[j + 3] |= bits >> 3;
                out[j + 4] |= bits << 5;
                break;
            case 7:
                out[j + 4] |= bits;
                break;
        }
    }
    return i/8 * 5;
}


int keysched(unsigned char *x, unsigned char *key, int keylen)
{
    int i;
    unsigned char tmp, a = 0;

    for (i=0; i < 256; i++)
        x[i] = i;

    for (i=0; i < 256; i++)
    {
        a += x[i] + key[i % keylen];
        tmp = x[i];
        x[i] = x[a];
        x[a] = tmp;
    }
}

int crypt(unsigned char *x, unsigned char *y, int len)
{
    unsigned char a;
    unsigned char b = 0;
    unsigned char tmp;
    int i;

    for (i=0; i < len; i++)
    {
        a = i+1;
        b += x[a];
        tmp = x[a];
        x[a] = x[b];
        x[b] = tmp;
        y[i] ^= x[(x[a] + x[b]) & 0xff];
    }
}

int main()
{
    unsigned char x[256];
    unsigned char key[] = "abcd";
    unsigned char crypt_text[sizeof(str)] = {};
    int len;

    len = b32dec(str, crypt_text, strlen(str));
    keysched(x, key, strlen(key));
    crypt(x, crypt_text, len);
    printf("%sn", crypt_text);
}

Micro-optimizing for source code size is unusual, and in some ways backwards to optimizing for generated code. For example, this change saved a couple of characters, but in the opposite way frequently done:

-            *o++ = d[0] << 3 | d[1] >> 2;
+            *o++ = d[0] * 8 | d[1] / 4;

Similarly, I found that combining unrelated functions was useful in eliminating the character waste of function definitions. There are likely a good deal more space-savers to be found; I quit when I got it small enough.

I experimented with a few different formats for the code. It turns out that I'm not terribly good at drawing ASCII. I abandoned a baby bottle as unrecognizable and went with a footprint after seeing this motif on some birth announcements. I hand-drew it, scanned it in, loaded as a background in an html document and then put dollar signs in the right places. Yes, cheating, but I am no artist.

                                          $$$$
                                        $$$$$$$$
                              $$$      $$$$$$$$$
                        $$   $$$$$    $$$$$$$$$
                       $$$$   $$$     $$$$$$$$$
                       $$$$             $$$$$$
                  $$   $$
                 $$$$            $$$$$$
             $  $$$$$       $$$$$$$$$$$$$
           $$$$  $$$$    $$$$$$$$$$$$$$$$$
           $$$$       $$$$$$$$$$$$$$$$$$$$$
           $$$$     $$$$$$$$$$$$$$$$$$$$$$$
            $$    $$$$$$$$$$$$$$$$$$$$$$$$$
                $$$$$$$$$$$$$$$$$$$$$$$$$$$
               $$$$$$$$$$$$$$$$$$$$$$$$$$$
              $$$$$$$$$$$$$$$$$$$$$$$$$$$
              $$$$$$$$$$$$$$$$$$$$$$$$$
              $$$$$$$$$$$$$$$$$$$$$$$$
              $$$$$$$$$$$$$$$$$$$$$$
              $$$$$$$$$$$$$$$$$$$$$
              $$$$$$$$$$$$$$$$$$$$
              $$$$$$$$$$$$$$$$$$$
              $$$$$$$$$$$$$$$$$$
              $$$$$$$$$$$$$$$$$
              $$$$$$$$$$$$$$$$$
              $$$$$$$$$$$$$$$$$
              $$$$$$$$$$$$$$$$
              $$$$$$$$$$$$$$$$
              $$$$$$$$$$$$$$$$
              $$$$$$$$$$$$$$$
               $$$$$$$$$$$$$
               $$$$$$$$$$$$
                 $$$$$$$$$
                    $$$$

I wrote a python script to encrypt and encode the string to be embedded in the code. A second script tokenized the original C source and replaced dollar signs from the text template with code. The latter script is not perfect, but worked well enough that I could hand-edit the output in a few seconds to get something reasonable.

The gory details are available at github.

Finally, on delivery day, I discovered that WordPress mangled C code included in posts. So I simply took a screenshot of the output and posted that instead, with a link to the original text. A picture of the newborn was hidden as a hyperlink from the footprint image.

Overall, the entire process took a couple of evenings from concept to completion, and I'm quite happy with the way it turned out. And, of course, I'm ecstatic about the inspiration: our newly arrived baby boy. We are very fortunate to have both Alex and now Ian in our lives, and silly C programs and fake man pages cannot come close to capturing our joy.

New house, new projects

This year I attained permanent residency in Canada, and our family also attained permanent residency in a different way, by buying our first, and probably last, house. We moved into it a few months ago, a fact I neglected to remark here, so if you are mailing me something, and for some reason read my blog, you’ll want to ask me for my new address.

With the house comes plenty of things to work on that are only marginally interesting, so I shall proceed to bore you with them from time to time.

I completed my first mini-project this weekend: installing task lighting in the kitchen. Our builder wanted to charge hundreds of dollars to put in (environmentally unsound) Xenon lights under the cabinets in the kitchen. I, having zero experience with house wiring, thought “I can do that!” Thus, we opted to have them install just the house wiring but we would take care of the lights.

led-spoolWhen I was a wee undergrad, LED lighting was then just around the corner. Installations existed, but they were terrifically pricey. Now, hundreds of years later, you can get lots of them on a spool for a few tens of dollars. The particular ones I purchased (from Amazon) come as a ribbon of copper with sticky tape on the back. The ribbon is essentially one 16-foot wire with groups of three small LEDs and a resistor in series, and each group connected in parallel. To use it, you just cut to length, and then solder on power and ground from the +12 volt DC power supply (sold separately). I went for ‘warm white’ LEDs (2700K) which are a bit into the yellow spectrum; they are quite a bit softer than your average super bright white LED.

led-wiring2.jpgI mounted the LEDs via the aforementioned tape on the back of the cabinet valence, and the power supplies on the cabinet undersides. The power supplies are designed to plug into a wall socket, but since we had junction boxes for the lighting pre-installed, I simply cut the ends off the cords and wired the DC supplies directly into the boxes. The house lines were already wired to a circuit with a wall switch, so that was all that was required. Each strip worked the first time.


Under cabinet lightingAll in all, it was a pretty uneventful install — the kind you want when dealing with A/C. I still need to staple up some hanging wires to the cabinet underside, but otherwise it’s finished, and the end result looks great.