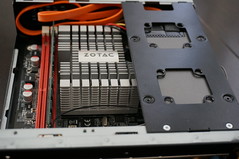
 The Zotac NM10-ITX is a mini-ITX motherboard, which in my configuration has a 1.66 GHz Atom D510 on board, 8 GB SSD, 2 GB ram, and a pair of 2×2 ath9k devices. I wound up with a few of these boxes as a mesh testbed due to my work with Cozybit. Until recently, they ran distro11s, which is basically Debian with some mesh/wireless utilities and some custom init scripts thrown on top. I was looking to re-image them, and I believe distro11s is not actively maintained. The boxes are beefy enough to run unmodified Debian, but OpenWRT has various niceties when building all things wireless from source, and I might like to run the same setup on more constrained devices, so I went with that.
Building OpenWRT from git is a rather simple affair [1]. In my case, I made a few trips through make kernel_menuconfig to get the right config for a properly booting kernel (namely, CONFIG_ATA_PIIX, CONFIG_INPUT_EVDEV, CONFIG_USB_HID, CONFIG_HID_GENERIC, and CONFIG_R8169 were needed for functional disk, keyboard, and network on boot). I also customized the network setup via files/etc/config/network so that eth0 would come up with DHCP rather than a fixed IP at 192.168.1.1.
Once built, one needs a way to copy the OpenWRT image onto the drive. Enter Bootable USB Stick.
I recently procured a speedy, spacious USB stick in order to run a sizeable VM on my disk-space-poor laptop. As I already had an ext4 partition on the USB stick, making it into a bootable rescue/installer OS was mostly a matter of debootstrap [2]. I gave it a user account, put my ssh keys on it, and also configured it to start up with DHCP on the first interface. Among other things, that means linking /etc/udev/rules.d/70-persistent-net.rules to /dev/null so that, as the rescue OS is booted on multiple machines, the first NIC remains named eth0.
On top of the base install, I copied the OpenWRT combined disk image onto the stick. Imaging a new machine then involves booting off the USB drive, overwriting the main block device with the disk image, and then resizing the root partition to use the full drive:
#!/bin/bash
gzip -dc /home/bob/openwrt-x86_64-combined-ext4.img.gz > /dev/sda
p2start=`sfdisk -d /dev/sda | grep sda2 | awk '{print $4}' | sed -e "s/,//"`
cat<<__EOM__ | fdisk /dev/sda
d
2
n
p
2
$p2start

w
__EOM__
resize2fs /dev/sda2
# may customize root image here for each device by mounting it, etc.
You can build disk images that match your disk size and skip repartitioning and resize2fs, but in the case that the disk is large (like mine), zero-filling all the unused space is a big waste of time. I'm sure there is a smart way to use sparse images to overcome this, but fdisk/resize2fs is the simplest thing that works for me.
Since I have my local DHCP server set up to assign known addresses and DNS names to these machines based on their MAC address, I can do the installs without a console on each machine: plug in the stick, reboot, ssh into it when it comes up, run my imaging script, shutdown and pull the stick. Easy!
