Scoped

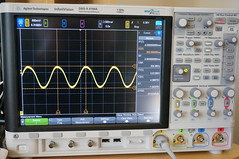
G#I have this more-expensive-than-my-car hunk of metal on loan for the next few weeks. It’s a pretty far cry from the old Tektronix analog scopes I trained on back in the day (which, at the time, were also much more expensive than my then-primary mode of transportation: shoes). As a warmup exercise, I hooked it up to the output of my guitar amplifier and played an A, which you can see pictured. You can also see that I’m apparently tuned down a half-step as the frequency measured on the scope is about a semitone shy of 220 Hz.

Making wavesThis was a neat teaching opportunity for my four year-old: I showed Alex visually that sound is just made up of different kinds of waves. Later at bathtime he connected that with the physical waves he was making in the tub: “Just like music!” he said.

serialized

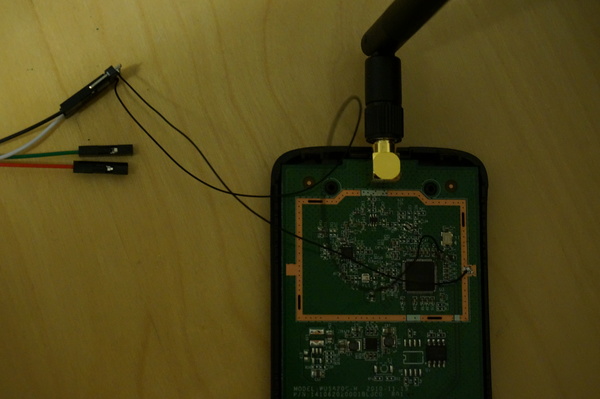
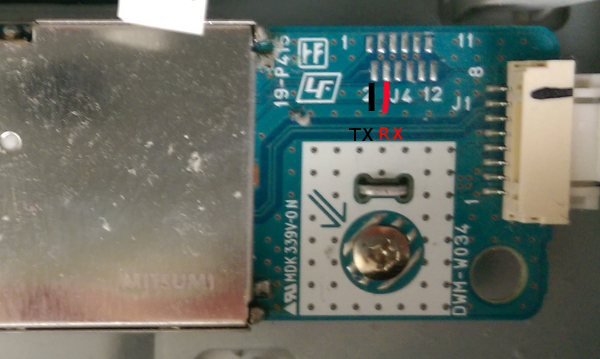
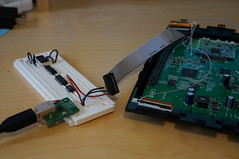
router += serialMy ath10k-based router now has serial headers, after I managed to crash it a few times over the weekend while testing out some patches. Thank you, TP-Link, for making the pins so easily accessible, to the extent that it’s easier to whip out the soldering iron than remind oneself how to setup kexec/kdump.

I do need to get one of these nifty usb-serial cables so that the JTAG ribbon cable + FTDI-breakout-on-a-breadboard monstrosity can go back into the
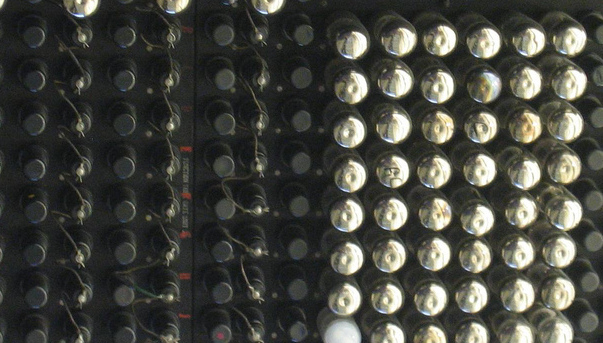
parts bin, but it is working fine otherwise. [The pictured 7-segment display and TTL chips are just misdirection, by the way.]

There was a momentary bit of confusion on my part when the console showed the router stuck in a loop requesting recovery firmware over TFTP instead of the normal boot process…until I realized that the reset button was wedged in the depressed state by the case. Whoops.

website rebuilt

Until recently, my vhost was running some ancient Ubuntu that was probably vulnerable to all manner of things, so I’ve finally upgraded it to a recent Debian release. A few things are still offline (including the blog theme) so there may be some broken links here and there for a few days until I get around to restoring everything.

I believe I’m going to leave comments off permanently going forward, there’s just too much spam even with it moderated, to the extent that I almost never bother to go through them. Comments out-of-band are always welcome, of course.

Spectrum

The ath9k and later chips support a spectral scan feature for measuring channel occupancy. I played with it for the first time last week over the Thanksgiving holiday. Simon Wunderlich’s FFT_eval is a great tool to look at the captured RF spectrum, but I found myself wanting something more real-time, and the various other things I found on github with that aim didn’t work for me. So, this too-ugly-to-live python hack happened.

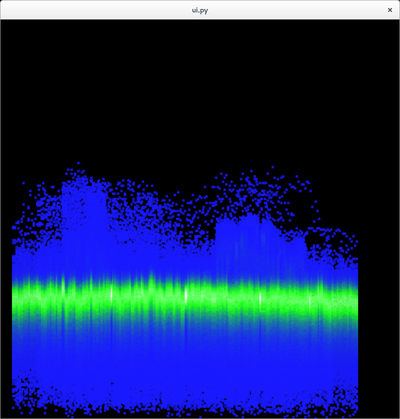
It turns out that the samples are rather coarse and infrequent, so the result is not as dynamic as I’d hoped. However, I made the pretty heatmap below with a few hours’ worth of samples, and although I didn’t yet label frequencies, you can see a couple of channels in active use. There’s still plenty of room for improvement in the visualization.

Fake Tassimo Cleaning Disk

My particular first world problem: it’s too easy to lose the cleaning disk that came with my coffee machine.

The item in question is just a plastic disk with a certain barcode. As I and many others have found, it is easy to print out a new barcode, tape the barcode to a used milk disk, and you are back up and running. Here is my contribution: said barcode in a PDF file ready for printing on Avery 5167 return address label sheets. Then, when you inevitably accidentally throw away your stand-in disk (which we have done a half dozen times so far), just peel off another label after your next latte.

If you have different label sheets, I recommend glabels3 to set up the template. The barcode value is “07879” using 2-of-5 interleaving (GNU barcode backend can generate these).

Update (03/2024):

Long ago this Tassimo bit the dust and it got replaced, bringing with it a new disk with a different barcode. Since this page still gets a lot of search traffic, here is an image of what that cleaning disk looks like in case any intrepid visitors need to reproduce it:

Halloween, 2014 ed.

2014 Halloween CostumesI believe I added just enough blog posts this year that there are not two years’ Halloween posts on the front page at the same time. That would be sad.

Alex told me in September that October was his favorite month of the year, “because Halloween.” And every day for the last few weeks, he would ask, “is it Halloween today?” I can only hope that this year’s candy crawl met his expectations. He went as Captain America, a decision that was entirely his own. Ian went as a penguin, or at least he wore parts of his penguin costume throughout the night, rarely all at once.

2014 PumpkinsFor jack-o-lanterns we went with a space theme this year: a space shuttle on one and Kodos on the other. I tried etching rather than carving but I couldn’t get the technique down, so I wound up carving for the most part. One fun addition, albeit short-lived, was the use of sparklers instead of LED candles as lighting. Next year we’ll use rocket engines.

functional bitrate sim

My wmediumd rewrite is a bit further along thanks to getting a few hours to hack on it this weekend. It can now accurately simulate throughput between a pair of radios using legacy rates. For example, if we set the SNR between two devices to 20 dB, then they can communicate at a nominal 54 mbps rate, yielding about 26 Mbps achieved in iperf:

[  3]  0.0-10.0 sec  31.2 MBytes  26.1 Mbits/sec

At 15 dB, we can send between 24 and 36 Mbps nominal rates, which yields:

[  3]  0.0-10.1 sec  21.0 MBytes  17.5 Mbits/sec

Note that achieved throughput is quite a bit lower than nominal, as in real life — if aggregation were implemented then they would be closer.

The basic architecture is pretty simple: frames are queued on a per-sender management or data queue depending on type, and delivery time is computed based on whether or not there is loss and the contention window parameters of the queues. A timerfd is used to schedule reporting of frame delivery back to the kernel at appropriate times. The delivery time does not take into account actual contention, although this could be done in principle by looking at all the queued frames for all stations.

I haven’t really decided what to do about configuration. I stripped out the jamming and probability matrix configurations, as I feel like doing things on a signal level basis are simpler. But at this point there’s no real way to specify signal levels either (other than hardcoding), and some scenarios probably want something dynamic (e.g. mobile stations).

Changes are in my wmediumd master branch. Unfortunately, I won’t have much time to work on this for the next two months, but patches for the many TODOs are welcome.

wmediumd speed test

Thanks to some inquries on linux-wireless, I took a look at wmediumd recently. The code could use a bit of work, and there are some features I’ve been meaning to add since forever, so I started gutting it with an eye towards sprucing up the architecture and feature set (changes can be found here).

One of the questions from the mailing list was whether wmediumd adds a lot of overhead compared to mac80211_hwsim. It is of course doing more work, with additional memory copies, context switches, etc — but is it enough to make wmediumd unworkable?

So I did a quick TCP iperf test on my laptop with an open mesh, and get the following numbers.

hwsim without wmediumd:

    [  3]  0.0-10.0 sec  1.36 GBytes  1.16 Gbits/sec

hwsim with wmediumd:

    [  3]  0.0-10.0 sec  1.27 GBytes  1.09 Gbits/sec

It looks like wmediumd is doing fine. This is with monitors running, the non-monitor case does about twice that. Actually, I think this is a bit lower than it should be, but considering both cases are close, and a good deal faster than your typical wifi connection, it’s probably good enough for some level of bandwidth simulation.

wpas mesh

Continuing where I left off with my OpenWRT mesh nodes, after installing the OS, the next step is to get a mesh-enabled userspace on them.

One can use iw to create an open mesh, and the authsae daemon for secure mesh, and OpenWRT already ships both of those, so just installing those packages is really all that is required.

However, I’m currently working on a patchset to add mesh support to wpa_supplicant, which could be useful for platforms where wpa_s is already present and running yet another daemon just for secure mesh is unpalatable. Here’s the recipe I’m using to keep the latest version on the device and use it for day-to-day activities.

Since OpenWRT can use git as a package source and already does so for hostapd, building a custom wpa_supplicant is mainly a matter of just changing the git repository url and config. I made the following changes in the package/network/services/hostapd directory:

diff --git a/package/network/services/hostapd/Makefile b/package/network/services/host
index 6872742..5985339 100644
--- a/package/network/services/hostapd/Makefile
+++ b/package/network/services/hostapd/Makefile
@@ -10,10 +10,10 @@ include $(TOPDIR)/rules.mk
 PKG_NAME:=hostapd
 PKG_VERSION:=2014-06-03
 PKG_RELEASE:=1
-PKG_REV:=84df167554569af8c87f0a8ac1fb508192417d8e
+PKG_REV:=prepare-submit-v12
 
 PKG_SOURCE:=$(PKG_NAME)-$(PKG_VERSION).tar.bz2
-PKG_SOURCE_URL:=git://w1.fi/srv/git/hostap.git
+PKG_SOURCE_URL:=https://github.com/cozybit/wpa_supplicant.git
 PKG_SOURCE_SUBDIR:=$(PKG_NAME)-$(PKG_VERSION)
 PKG_SOURCE_VERSION:=$(PKG_REV)
 PKG_SOURCE_PROTO:=git
diff --git a/package/network/services/hostapd/files/wpa_supplicant-full.config b/packa
index bbfaa73..4d9e00e 100644
--- a/package/network/services/hostapd/files/wpa_supplicant-full.config
+++ b/package/network/services/hostapd/files/wpa_supplicant-full.config
@@ -407,3 +407,9 @@ CONFIG_NO_RANDOM_POOL=y
 NEED_80211_COMMON=y
 
 CONFIG_IBSS_RSN=y
+
+CONFIG_AP=y
+CONFIG_P2P=y
+CONFIG_TDLS=y
+CONFIG_SAE=y
+CONFIG_MESH=y

(Offhand, I don’t know if P2P and TDLS are really required, but as it matches my existing config, we’ll go with that.)

You’ll also need to enable CONFIG_WPA_SUPPLICANT_OPENSSL=y in the OpenWRT menuconfig in order for SAE to link properly.

Rebuilding from scratch looks like this:

rm dl/hostapd-*.tar.bz2
make package/hostapd/{download,prepare,clean,compile,install} V=s

Once built, I have a simple script which copies over the bin/x86_64/packages/{hostapd*,wpa-s*} files and then runs opkg install on each of the nodes.

To start the mesh, I use the following script:

#!/bin/bash
pubip=`ip route get 8.8.8.8 | awk 'NR==1 {print $NF}'`
last8=`echo $pubip | awk -F . '{print $4}'`
meship=10.10.1.$last8
iface=wlan0

cat<<__EOM > wpa_s.conf
network={
    ssid="your-meshid-here"
    mode=5
    frequency=2412
    key_mgmt=SAE
    psk="your-pw-here"
}
__EOM
ip addr flush $iface
ip link set $iface down
iw dev $iface set type mp
ip link set $iface up
ip addr add $meship/24 dev $iface

killall wpa_supplicant
wpa_supplicant -dd -i $iface -c wpa_s.conf >wpa_s.log 2>&1 &

In response to the previous blog post, Johannes Berg pointed out that running nfsroot and PXE booting these devices would be even easier than futzing with USB sticks and copying binaries back and forth. Unfortunately, the BIOS on these machines doesn’t appear to support netboot, and at least for now, I can’t be bothered to figure out how to do it from within grub. At any rate, I find this setup makes for a fairly painless compile / deploy / test cycle.

Zotac OpenWRT

ZOTAC! The Zotac NM10-ITX is a mini-ITX motherboard, which in my configuration has a 1.66 GHz Atom D510 on board, 8 GB SSD, 2 GB ram, and a pair of 2×2 ath9k devices. I wound up with a few of these boxes as a mesh testbed due to my work with Cozybit. Until recently, they ran distro11s, which is basically Debian with some mesh/wireless utilities and some custom init scripts thrown on top. I was looking to re-image them, and I believe distro11s is not actively maintained. The boxes are beefy enough to run unmodified Debian, but OpenWRT has various niceties when building all things wireless from source, and I might like to run the same setup on more constrained devices, so I went with that.

Building OpenWRT from git is a rather simple affair [1]. In my case, I made a few trips through make kernel_menuconfig to get the right config for a properly booting kernel (namely, CONFIG_ATA_PIIX, CONFIG_INPUT_EVDEV, CONFIG_USB_HID, CONFIG_HID_GENERIC, and CONFIG_R8169 were needed for functional disk, keyboard, and network on boot). I also customized the network setup via files/etc/config/network so that eth0 would come up with DHCP rather than a fixed IP at 192.168.1.1.

Once built, one needs a way to copy the OpenWRT image onto the drive. Enter Bootable USB Stick.

I recently procured a speedy, spacious USB stick in order to run a sizeable VM on my disk-space-poor laptop. As I already had an ext4 partition on the USB stick, making it into a bootable rescue/installer OS was mostly a matter of debootstrap [2]. I gave it a user account, put my ssh keys on it, and also configured it to start up with DHCP on the first interface. Among other things, that means linking /etc/udev/rules.d/70-persistent-net.rules to /dev/null so that, as the rescue OS is booted on multiple machines, the first NIC remains named eth0.

On top of the base install, I copied the OpenWRT combined disk image onto the stick. Imaging a new machine then involves booting off the USB drive, overwriting the main block device with the disk image, and then resizing the root partition to use the full drive:

#!/bin/bash
gzip -dc /home/bob/openwrt-x86_64-combined-ext4.img.gz > /dev/sda
p2start=`sfdisk -d /dev/sda | grep sda2 | awk '{print $4}' | sed -e "s/,//"`
cat<<__EOM__ | fdisk /dev/sda
d
2
n
p
2
$p2start

w
__EOM__
resize2fs /dev/sda2
# may customize root image here for each device by mounting it, etc.

You can build disk images that match your disk size and skip repartitioning and resize2fs, but in the case that the disk is large (like mine), zero-filling all the unused space is a big waste of time. I'm sure there is a smart way to use sparse images to overcome this, but fdisk/resize2fs is the simplest thing that works for me.

Since I have my local DHCP server set up to assign known addresses and DNS names to these machines based on their MAC address, I can do the installs without a console on each machine: plug in the stick, reboot, ssh into it when it comes up, run my imaging script, shutdown and pull the stick. Easy!